# Management of properties
Configurations under the manage category are set to aid in the management of various participants in a scheme. Click on the drop-down submenu links to open the respective windows for specific configurations as shown below:

# Property Managers
Click the Property Managers link to open the property managers window where all the property managers in a scheme are listed in a grid table as shown below:
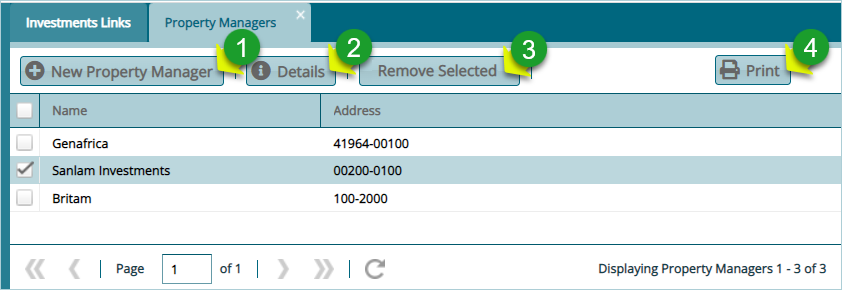
Action
Click Label 1 button to add a new property manager.
Click label 2 button to view the details of a selected manager from the grid table.
Click label 3 button to remove a selected manager's record from the list.
Click label 4 button to compile and display a print version of managers details.
Clicking the New Property Manager button will open the property manager details dialog box through which details for a new manager can be captured and saved in the system as shown below:
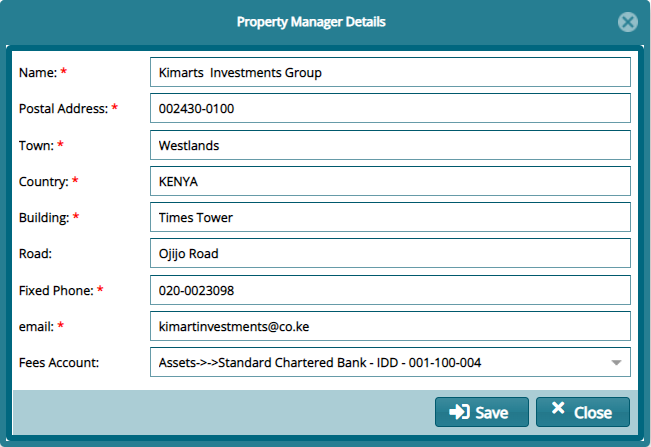
Tips
Fill all the mandatory fields marked with a red asterisk sign and on the fees account field select the GL account to associate the property managers transactions with the appropriate account. Click the Save button to commit changes.
# Stake Holders
Click the Share Holders link to open the property shareholders window where all the property shareholders in a scheme are listed in a grid table as shown below:
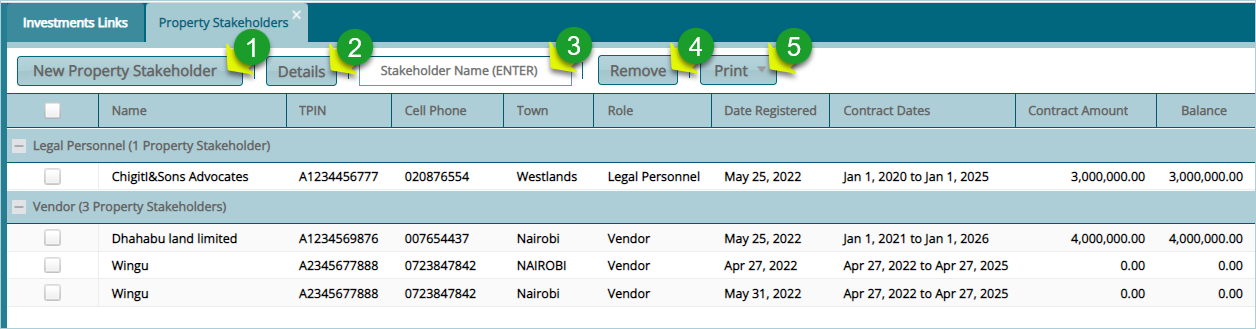
Action
Click Label 1 button to add a new property shareholder.
Click label 2 button to view the details of a selected shareholder from the grid table.
Click label 3 button and type the name of a shareholder to filter records by name.
Click label 4 button to remove a selected shareholder record from the list.
Click label 5 to compile and display a print version of shareholders details.
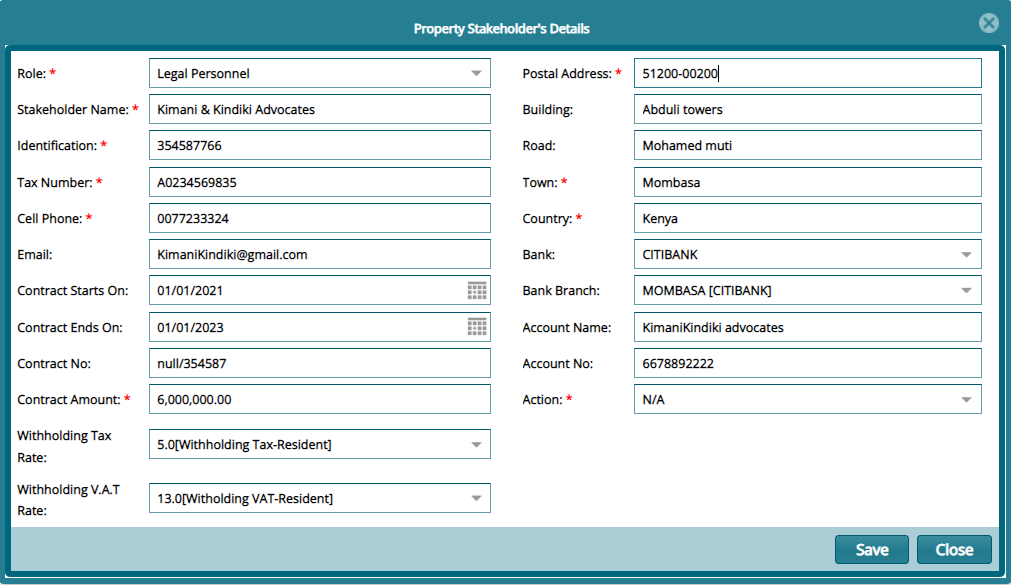
Clicking the New Property Shareholder button will open the Property Shareholder details dialog box through which details for a new shareholder can be captured and saved in the system as shown below:
# Property Agents
Click the Property Agents link to open the property agents window where all the property agents in a scheme are listed in a grid table as shown below:
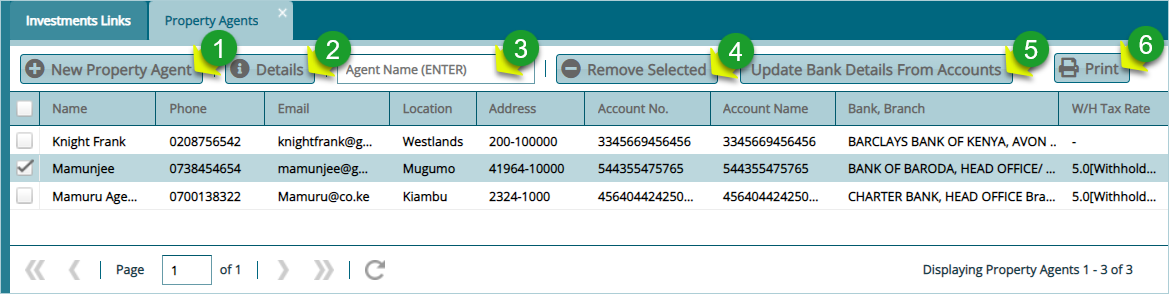
Action
Click Label 1 button to add a new property agent.
Click label 2 button to view the details of a selected agent from the grid table.
Click label 3 button and type the name of an agent to filter records by name.
Click label 4 button to remove a selected agent record from the list.
Click label 5 button to update bank details of a selected agent from the list.
Click label 6 to compile and display a print version of agents' details.
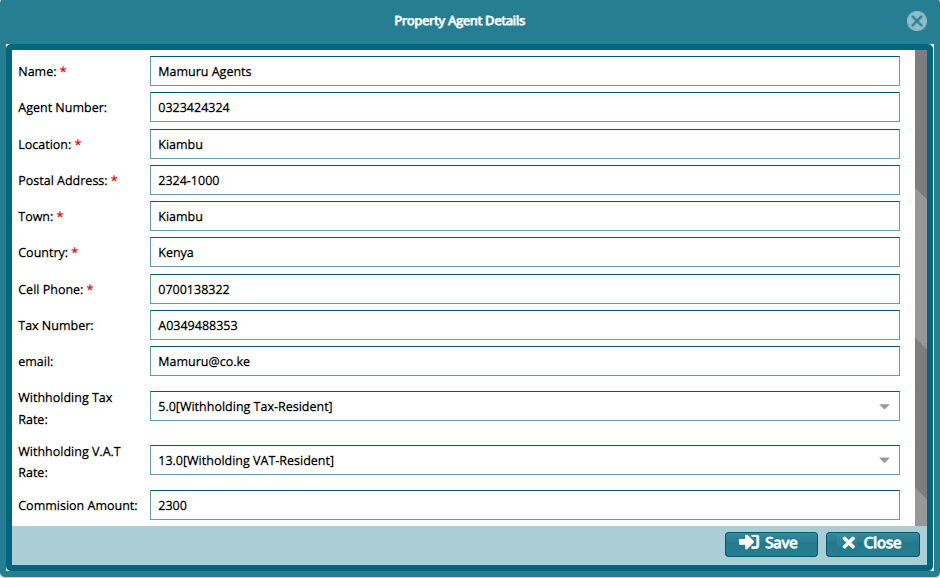
Clicking the New Property Agent button will open the Property Shareholder details dialog box through which details for a new shareholder can be captured and saved in the system as shown below:
# Property Buyers
Click the Property Buyers link to open the property buyers window where all the property buyers in a scheme are listed in a grid table as shown below:
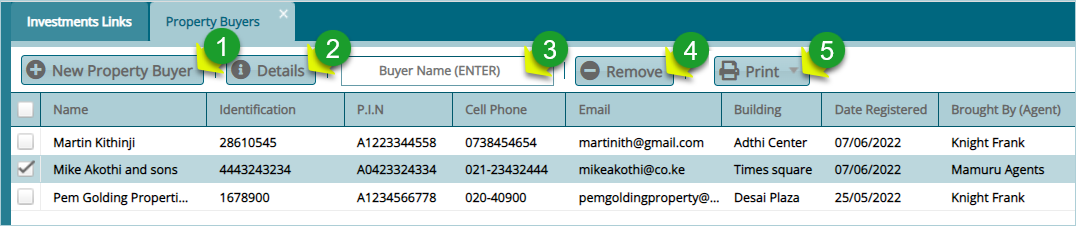
Action
Click Label 1 button to add a new property buyer.
Click label 2 button to view the details of a selected agent from the grid table.
Click label 3 button and type the name of a buyer to filter records by name.
Click label 4 button to remove a selected buyer record from the list.
Click label 5 to compile and display a print version of buyers' details.
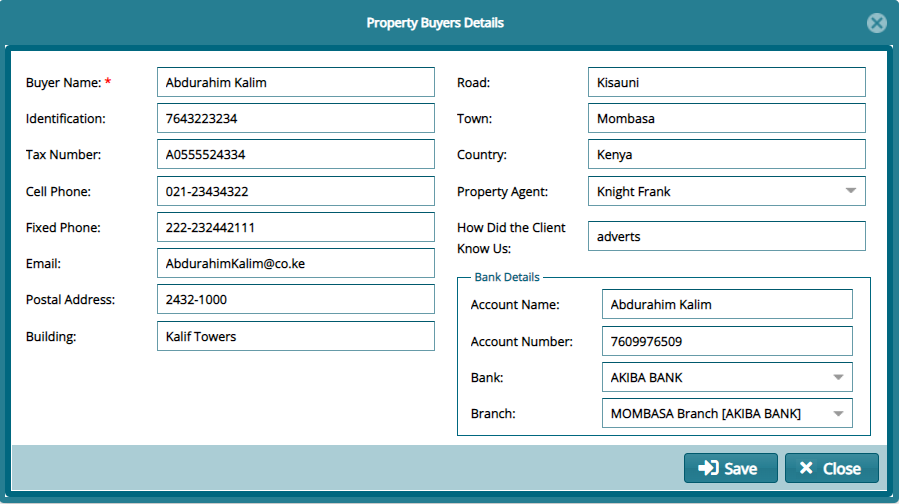
Clicking the New Property Buyer button will open the property buyer's details dialog box through which details for a new buyer can be captured and saved in the system as shown below:
# Service Charge Types
Click the Service Charge Types link to open the service charge types window where all types of charges are listed in a grid table as shown below:
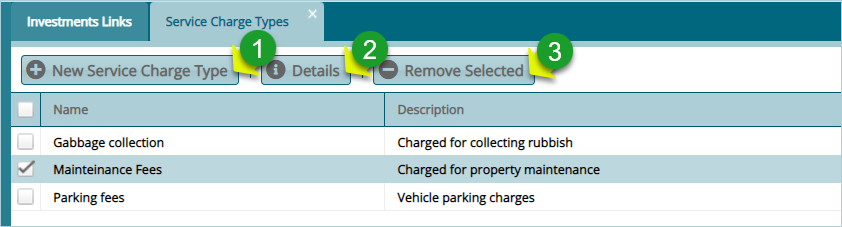
Action
Click Label 1 button to add a new type of service charge.
Click label 2 button to view the details of a selected service type from the list.
Click label 3 button to remove a selected service charge record from the list.
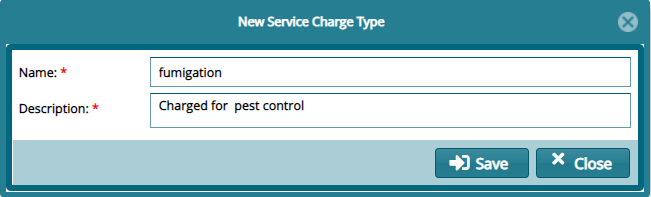
Clicking the New Service Charge Type button will open the property buyer's details dialog box through which details for a new service charge can be created and saved in the system as shown below:
# Unit Sale Additional Cost Types
Click the Unit Sale Additional Cost type link to open the service charge types window where all types of charges are listed in a grid table as shown below:

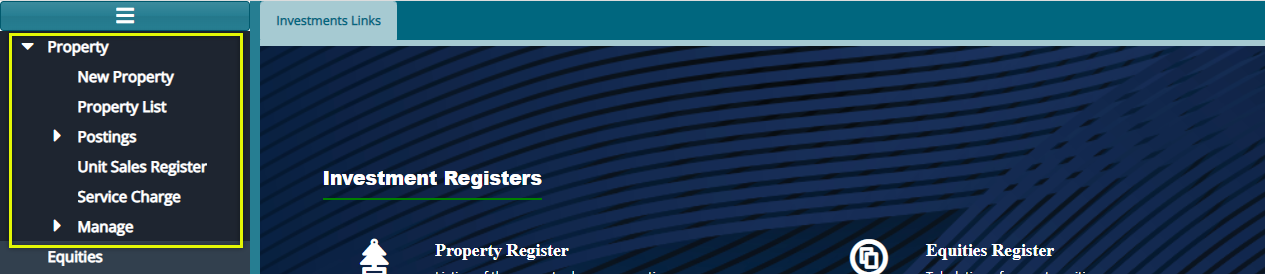
# Registration of Properties
Configurations under the property’s menu category are set to aid in the management of various participants in a scheme. Click on the drop-down submenu links to open the respective windows for specific configurations as shown below:
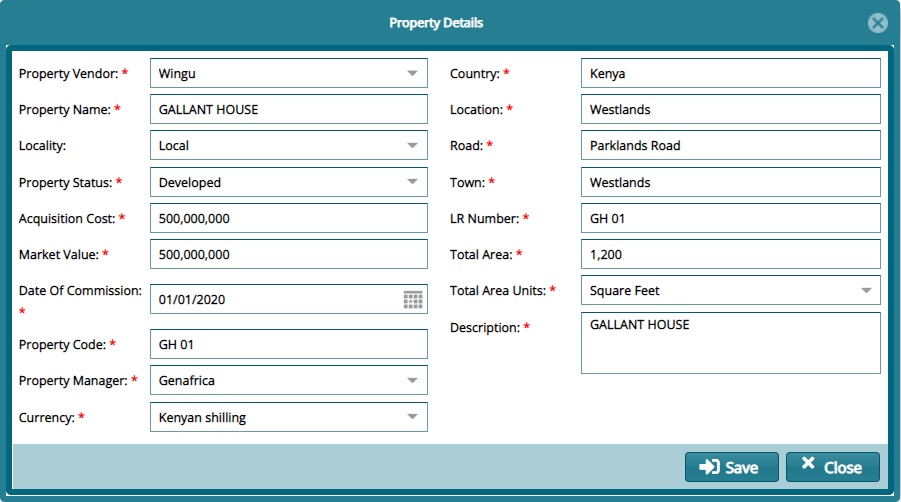
# New Property
Click the New Property link to open the property details dialog box to capture the data for a new property bought by a scheme as shown below:
# Property List
Click the Property List link to open the properties window where all scheme's properties in a scheme are listed in a grid table as shown below:
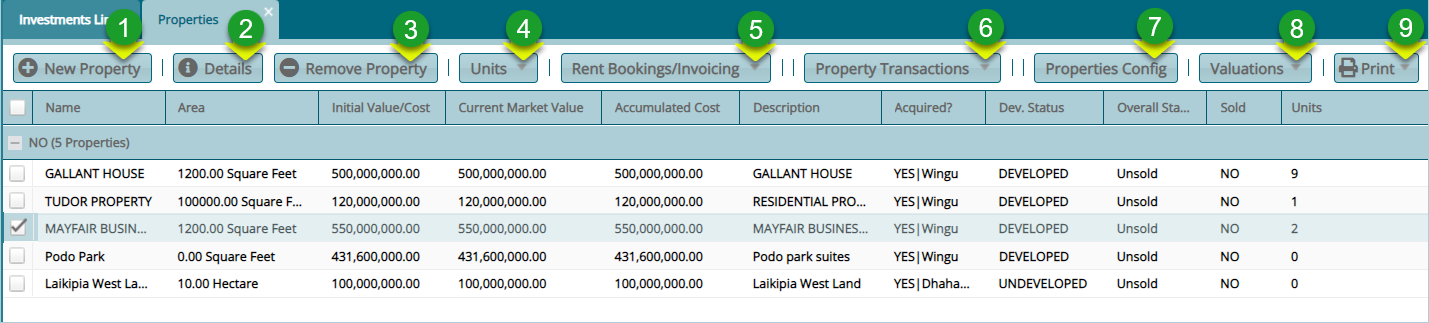
Action
Click Label 1 button to add a new property's details.
Click Label 2 button to edit details of a selected property from the list.
Click Label 3 button to remove a selected property from the list.
Click Label 4 button to create units for a selected property among other related actions.
Click Label 5 button to book for renting of a selected property from the list.
Click Label 6 button to run the process of acquiring a selected property from the list.
Click Label 7 button to configure general property settings.
Click Label 8 button to set up a selected property for valuation.
Click label 9 button to compile and display a print version of property's details.
Creating property units
Click the Units menu to view a drop-down menu from which a new unit can be created, existing units updated, view existing leases, a list of a property units as shown in the screenshot below:
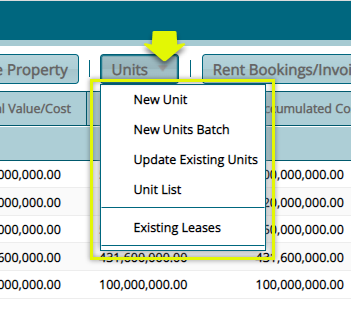
Action
Click New Unit to add a unit to a property.
Click New Unit Batch to add many units from a template to a property.
Click Update Existing Units to change unit details.
Click Unit List to view all units in a selected property.
Click Existing Leases to view details of already leased property units.
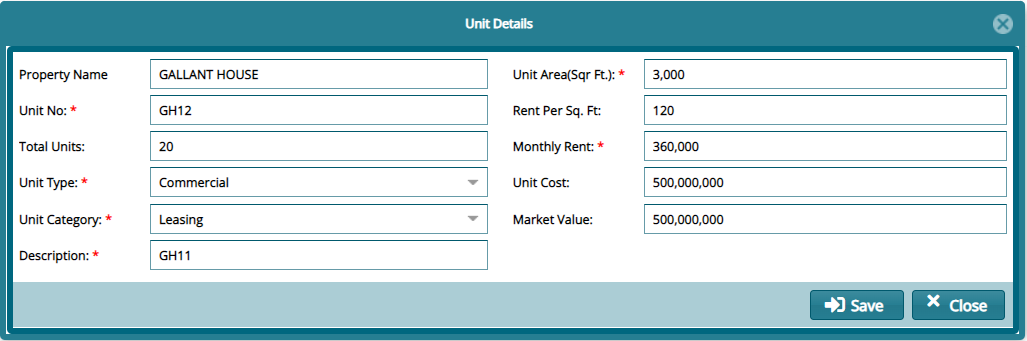
Creating a New Unit
To create a new property unit, select a property from the grid table and click the New Unit link to open a dialog box and provide details for a new unit as shown below:
Viewing a list of Unit
To create a new property unit, select a property from the grid table and click the List of Unit link to open a window where all units are listed in a grid table as shown below:
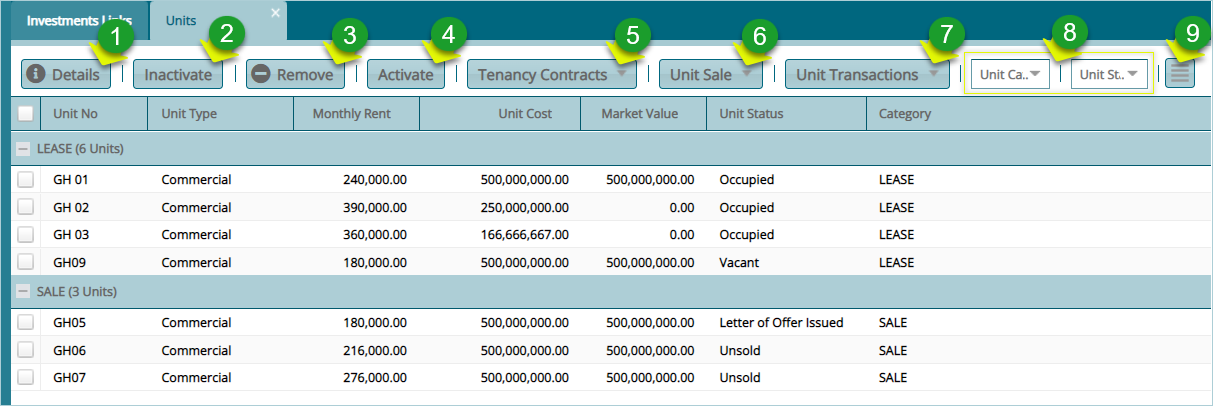
Action
Click Label 1 button to view the details of a selected unit.
Click Label 2 button to Inactivate a selected unit.
Click Label 3 button to remove a selected unit.
Click Label 4 button to activate a selected unit.
Click Label 5 button to view tenancy agreements.
Click Label 6 button to initiate sales related operations.
Click Label 7 button to carry out transactions such as cancelation of a unit reservation.
Click Label 8 text fields to filter records accordingly.
Click label 9 button to load an extra section on the lower side of the window displaying extra details of a selected unit among other actions.
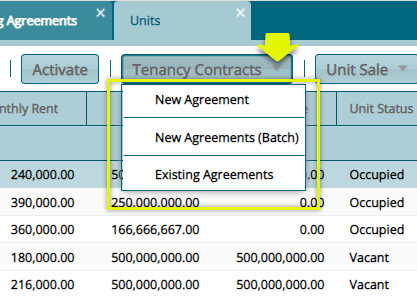
Tenancy contracts
Click the Tenancy Contract menu to view a drop-down menu from which a new agreement can be created (single or in batch) and existing agreements viewed as shown in the screenshot below:
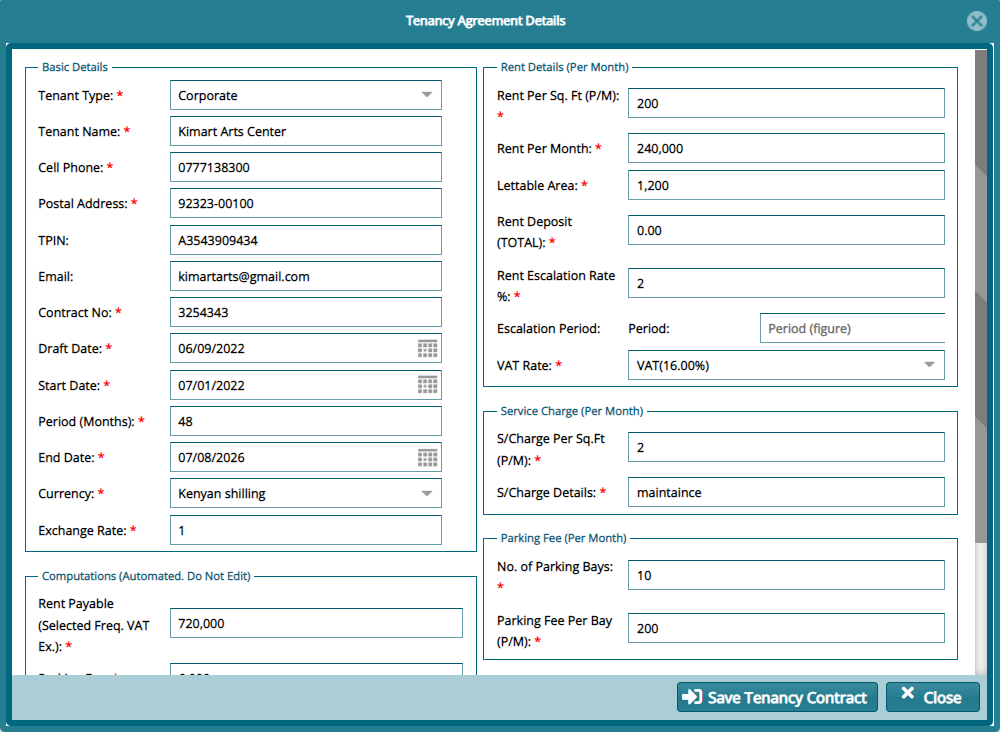
Creating a New Agreement
To create a new unit agreement, select a unit from the grid table and click the New Agreement link to open a dialog box and provide details for a new unit agreement as shown below:
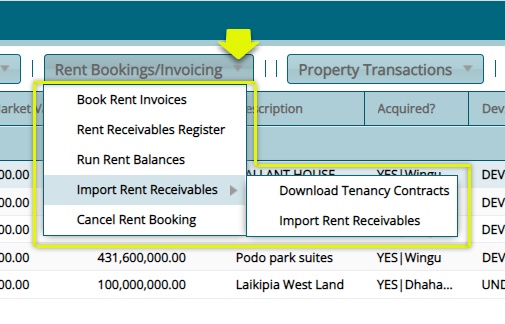
Booking/Invoicing Property
Click the Rent Booking/Invoicing menu to view a drop-down menu from which a new a rent invoice can be booked among other actions as shown below:
Property Acquisition Processing
Click the Property Transactions menu to view a drop-down menu from which an acquisition can be processed among other actions as shown below:
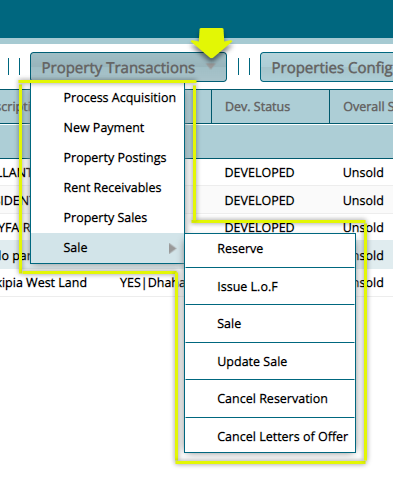
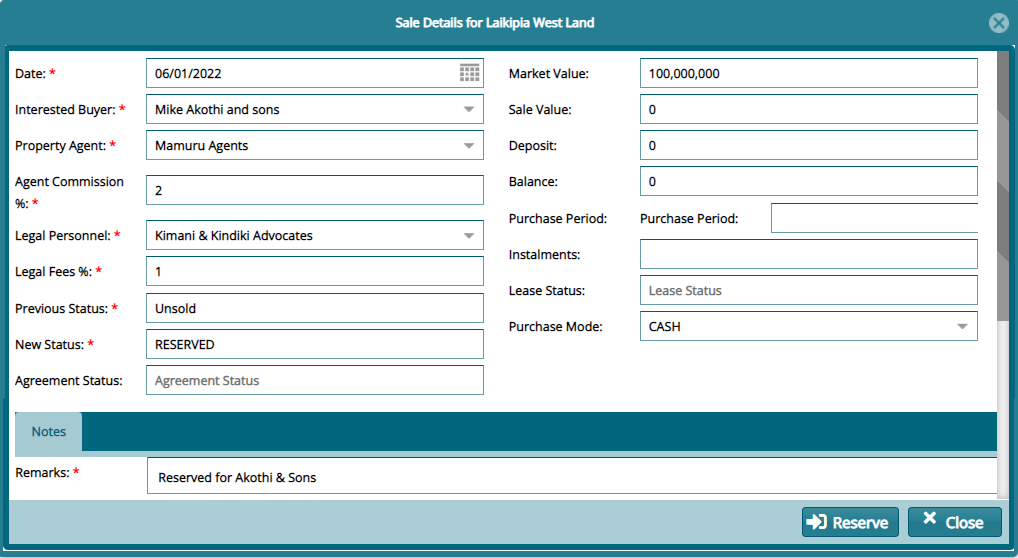
Click Reserve menu to process the reservation of a selected property as shown below:
Property Configuration
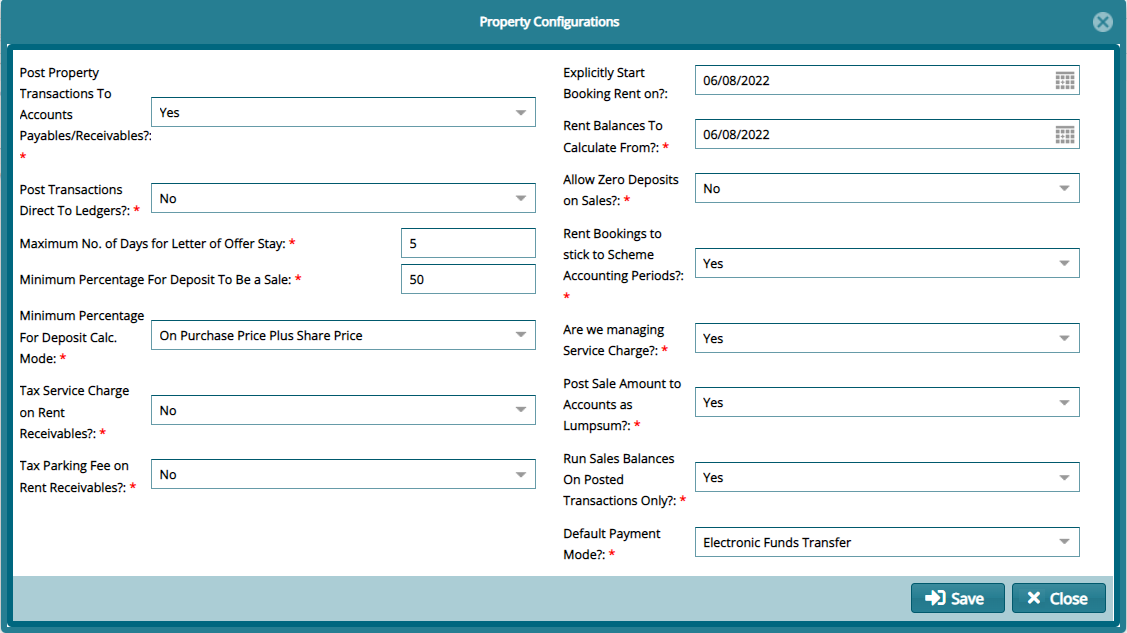
Click the Property Configuration menu to open a dialog box for configuring property various property parameter as shown below:
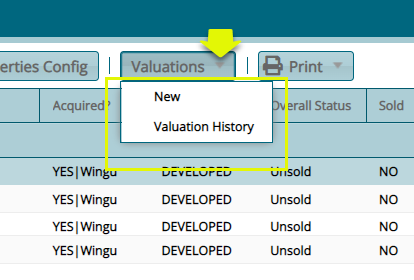
Valuations
Click the Valuation menu to view a drop-down menu from which a property valuation can be done, and the history of the same property viewed as shown below:
To create a valuation, click the New link to open a valuations details dialog box as shown below:

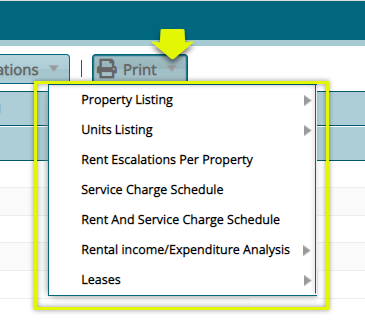
Print reports
Click the Print menu to view a drop-down menu from which various reports can be viewed and printed as shown below:
# Postings
The two links under the posting menu allow viewing of a scheme's property details. Click a link to open the respective window for specific configurations as shown below:

# Property Postings
Click the Property Postings link to open the property posting window where all scheme's properties details are listed in a grid table. From this window the records in the grid table can be filtered from the top menu bar, clicking the icon on the upper right side will load a submenu where other operations such as certification and receipting can be done as shown below:
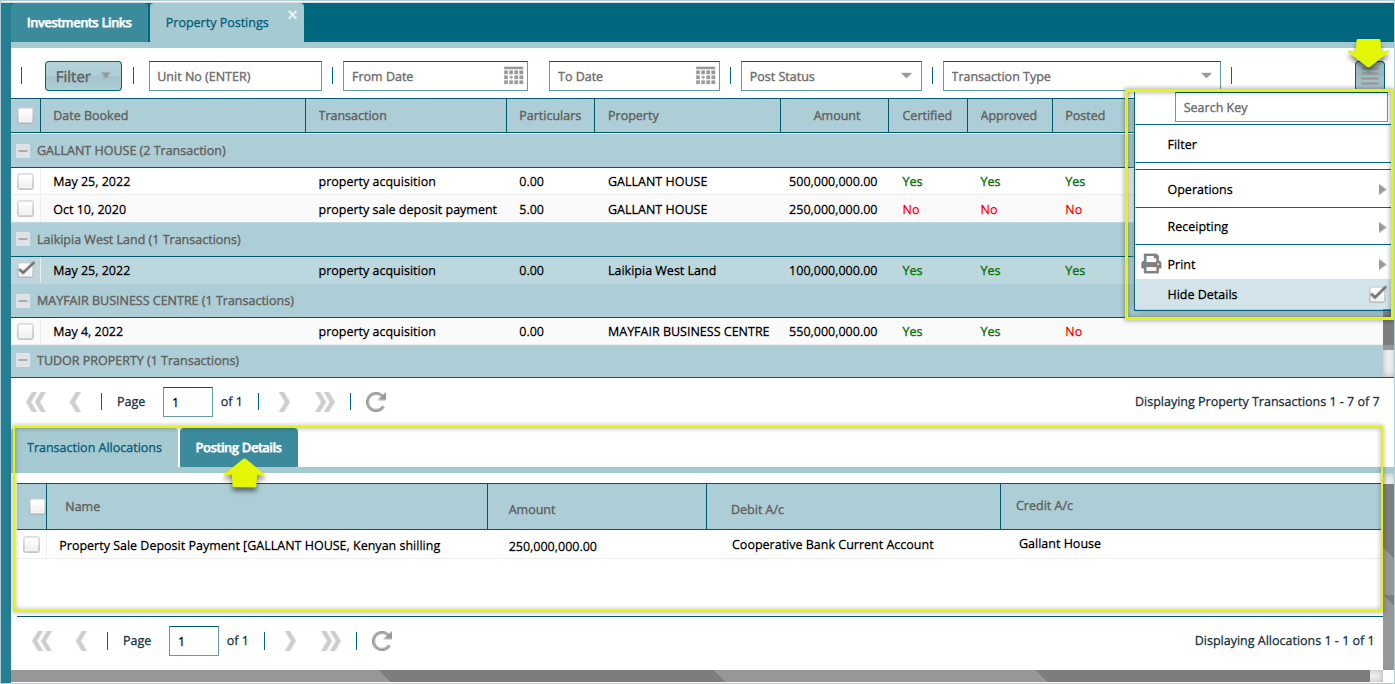
Tip
- Click the Posting Details tab on the lower section of the window as highlighted above to view posting details of a selected record.