# Admin Panel
The access links under the Admin Panel menu allow viewing of a list of all processes categories and task instances and other parameters. Click the drop-down submenu links to open their respective windows as shown below:

# Process Register
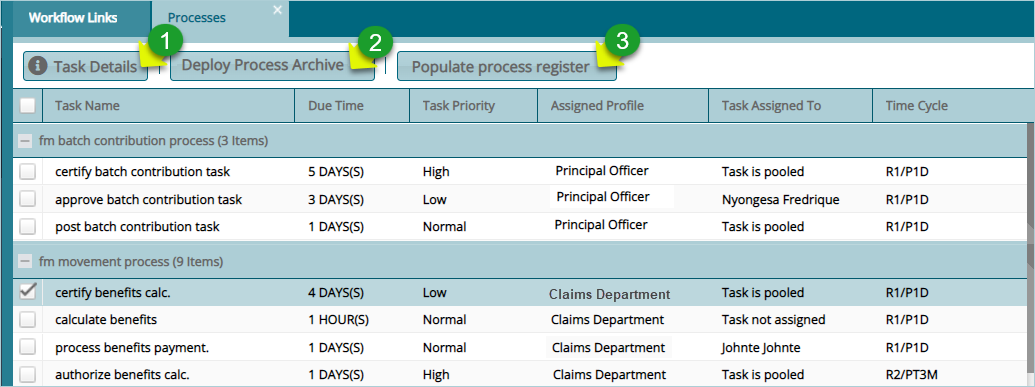
Clicking the Process Register link will open the Processes window where the details for all processes and their different tasks, assigned users and other details are displayed in a grid table as shown below:
Action
Click Label 1 button to view the details of a selected task from the list and edit the details where necessary.
Click Label 2 button to load process archive to the database ready for database update.
Click Label 3 button to populate process register with new processes and tasks.
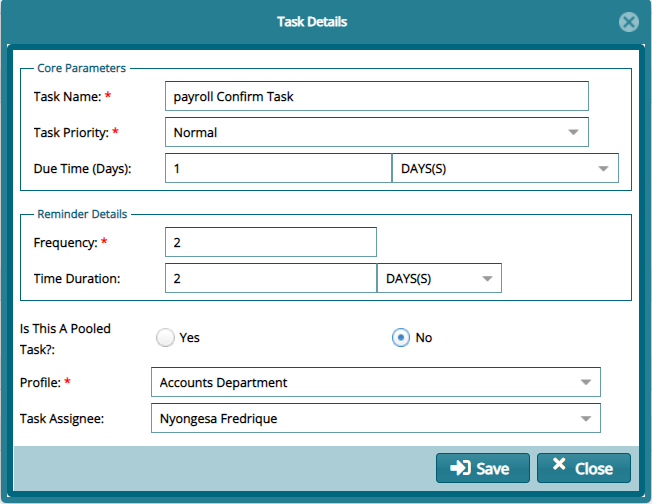
Clicking the Task Details button will open the task details dialog box where the details of a selected task from the list can be viewed and configured as shown below:
Action
The Task Details dialog box allows you to set the following parameters for each task
Priority of a task: choose between low, normal, or high.
Due time for the task: Choose minutes, hours, or days.
Task reminder: choose the frequency and time duration.
Determine whether the task is pooled or allocated to a selected user.
If the user is to be selected, choose the profile and the profile user to assign the task to.
# Task Instances
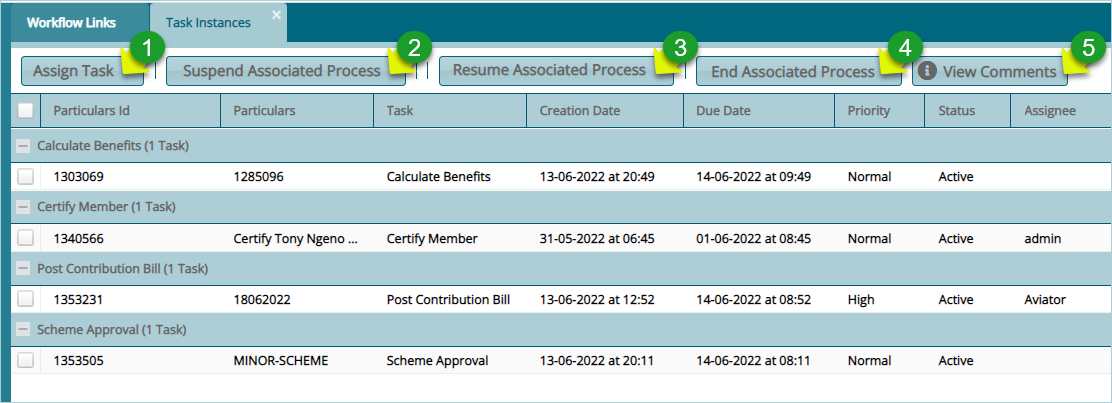
Clicking the Task Instances link will open the tasks instances window where new tasks and their details are listed for further actions such as assigning task to users. See screenshot below:
Action
Click Label 1 button to assign a selected task to a user from a pool.
Click Label 2 button to stop the process associated with a selected task.
Click Label 3 button to start a stop process associated with a selected task.
Click Label 4 button to terminate the process associated with a selected task.
Click Label 5 button to view the open a comment dialog box of a selected task.
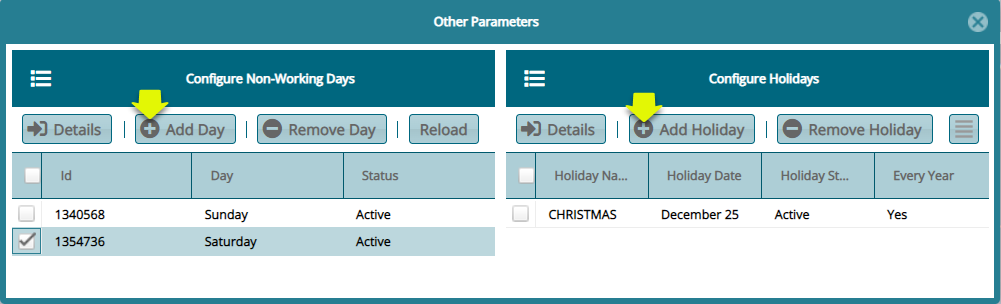
# Other Parameters
Clicking the Other Parameters link will open the other parameters window where non-working days and holidays are configured. This will enable the workflow schedular to omit these days in allocation of tasks to days.
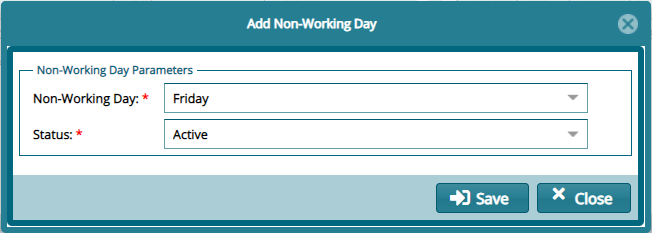
To configure a non-working day, click the Add Day button to open a dialog box to set the day and Add Holiday button to set a day as holiday among other settings such as removing a set day as shown below:
To configure a non-working day, click the Add Day button will open a dialog box for setting up the day as shown below:
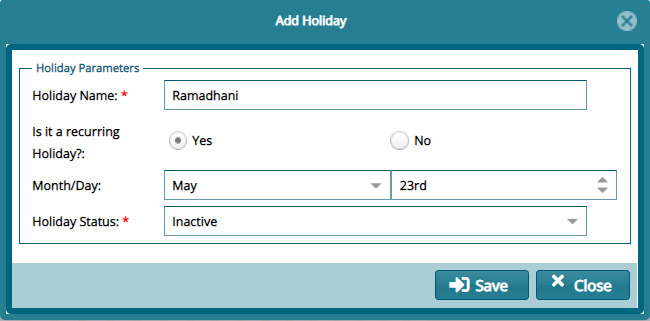
To configure a holiday, click the Add Holiday button will open a dialog box for setting up the day as shown below: