# General Ledger
The General Ledger menu provides access links to windows where the respective configurations are listed in grid tables and new ones are set. Click the links highlighted below to access specific windows:

# Chart of Accounts
A chart of Accounts (COA) is an index of all financial accounts set up in a scheme, and available for use by the bookkeeper for recording transactions in the general ledger.
# Creating a Chart of Accounts
For a new scheme, a new Chart of Accounts needs to be set from scratch as will be demonstrated next. Click the Chart of Accounts link from the General Ledger menu as shown in the previous screenshot.
On the right side of the screen, locate the Initial Chart menu and from the drop-down menu click Create Default Chart link as shown below:
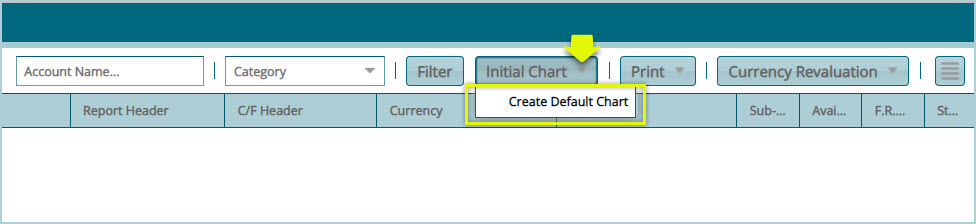
Clicking the Create Default Chart link will automatically generate the main types of accounts namely: Assets, Liabilities, Revenues, Expenses, and an additional Members Fund account - seeing this is a funds-related scheme. See the screenshot below:

# Creating a Single General ledger
After the default accounts are generated (labelled Heading in the charts), as shown previously, select an account category from the list (e.g., Expenses) to create a general ledger account as shown below:
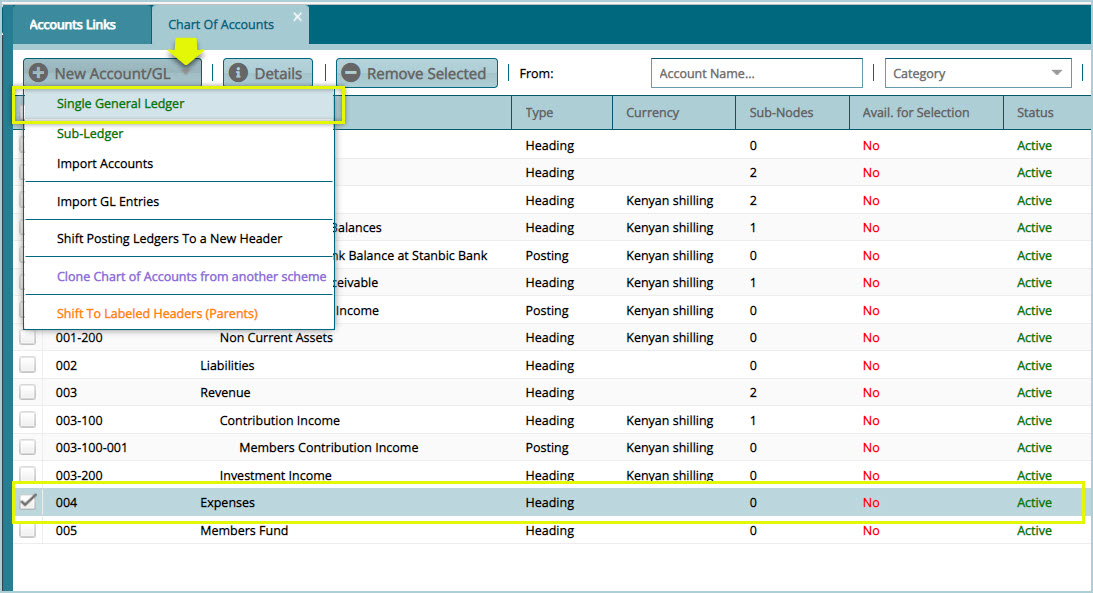
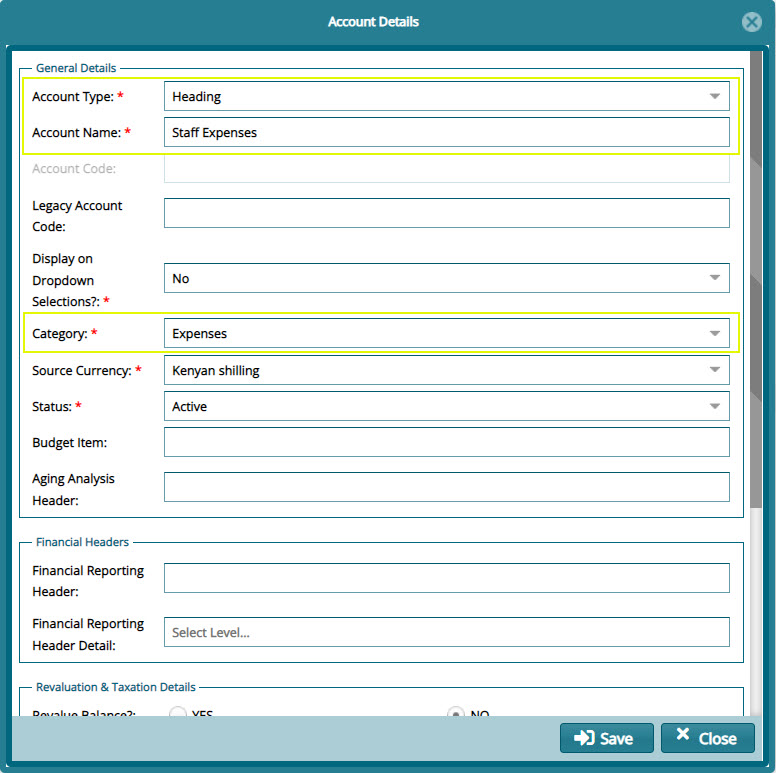
Clicking the Single General Ledger link will open a dialog box enabling the creation of a GL account for a particular category of expenses (e.g., Staff expenses) under the Expenses main account. To achieve this, fill in the details (Make sure the Account Type, Account Name, and Categories are filled correctly) as shown in the screenshot below:
Tips
After the default account categories are generated - labelled Heading. A bookkeeper can begin to build the chart of accounts (bookkeeping system) by creating different types of accounts under each category e.g., under the Expenses category, a Staff Expenses account can be created - labelled Heading. Within this GL account, entries - labelled Posting - can be created e.g., Staff Training, Goods Supplies, etc. as demonstrated next.
In FundMaster, a chart of accounts builds a T-shape pattern in the Chart of Accounts window as more accounts and posting to the accounts are created.
# Journals
A journal is created to correct an account that was overstated or understated by debiting or and crediting the affected transactions accounts.
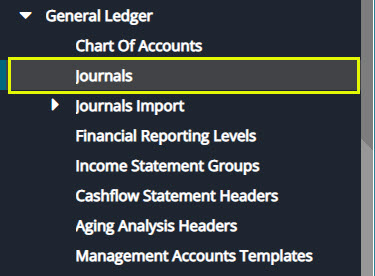
To access the journals records, on the left side panel of the accounts link window, click the Journals link as shown below:
Clicking the Journal link will open the journals window where all transactions are listed in a grid table. From this window, a new journal can be created, and records authenticated among other actions as shown in the screenshot below:
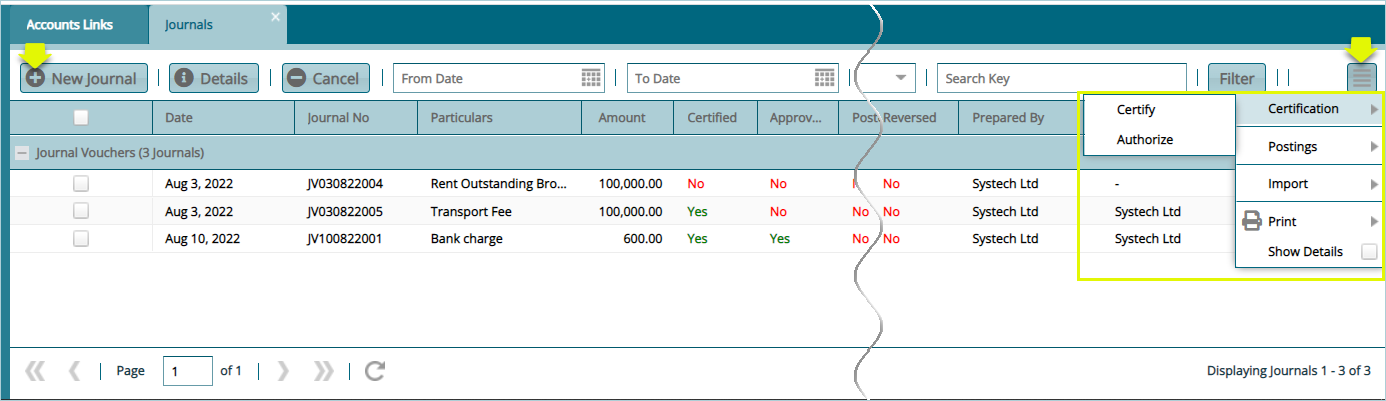
Click the New Journal menu to open a dialog box via which a new transaction can be processed as shown in the screenshot below:
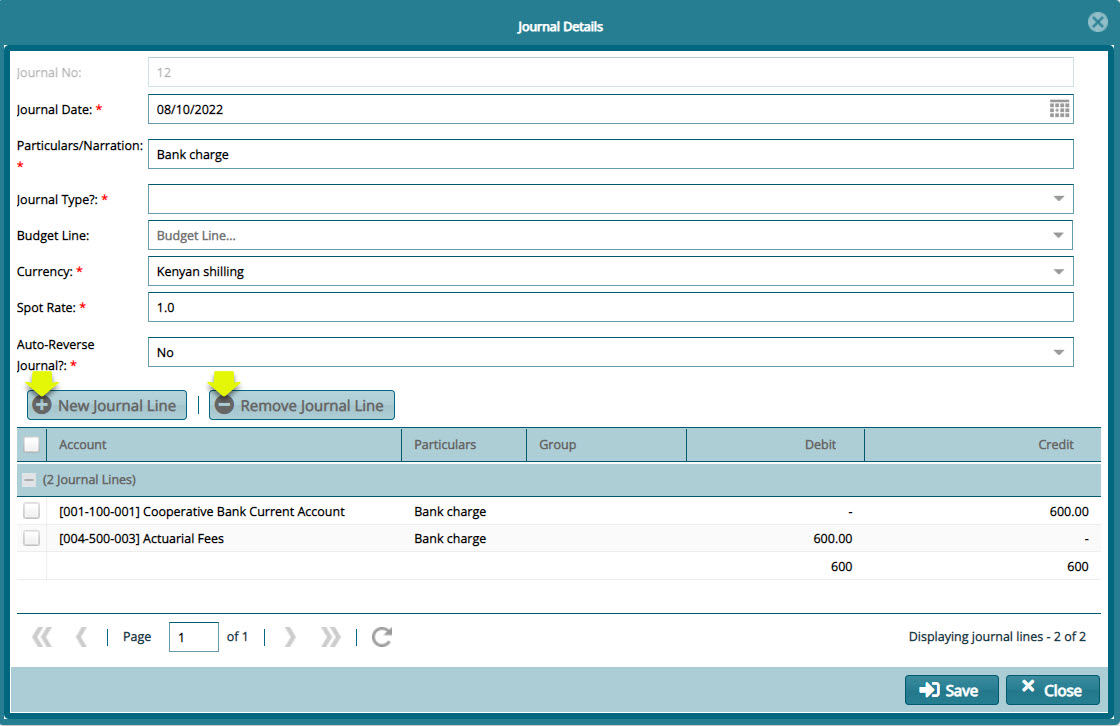
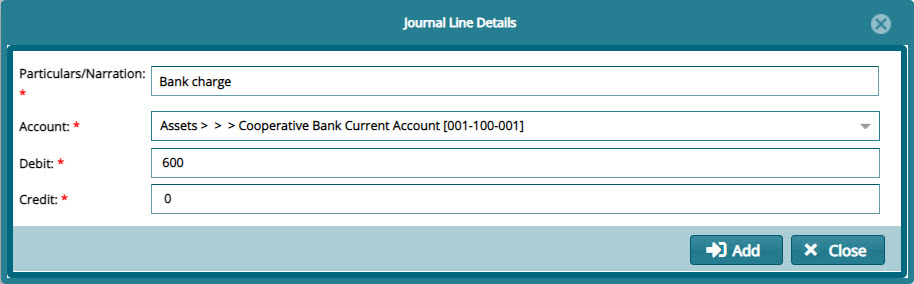
Click the New Journal Line button to select the account to debit and credit as shown in the following screenshots:
- Debit the correct account by providing the details as shown in the dialog box below:
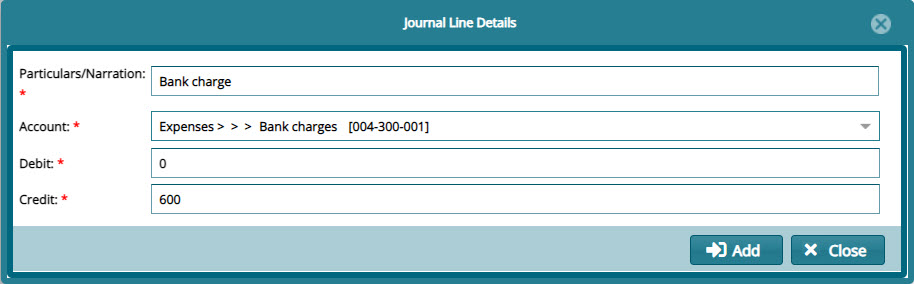
- Credit the correct account by providing the details as shown in the dialog box below:
# Financial Reporting Levels
Click on the Financial Reporting Levels link from the General Ledger drop-down menu to open the Financial Reporting Levels window where a financial reporting grid table divided into an upper and lower grid appears as shown below:
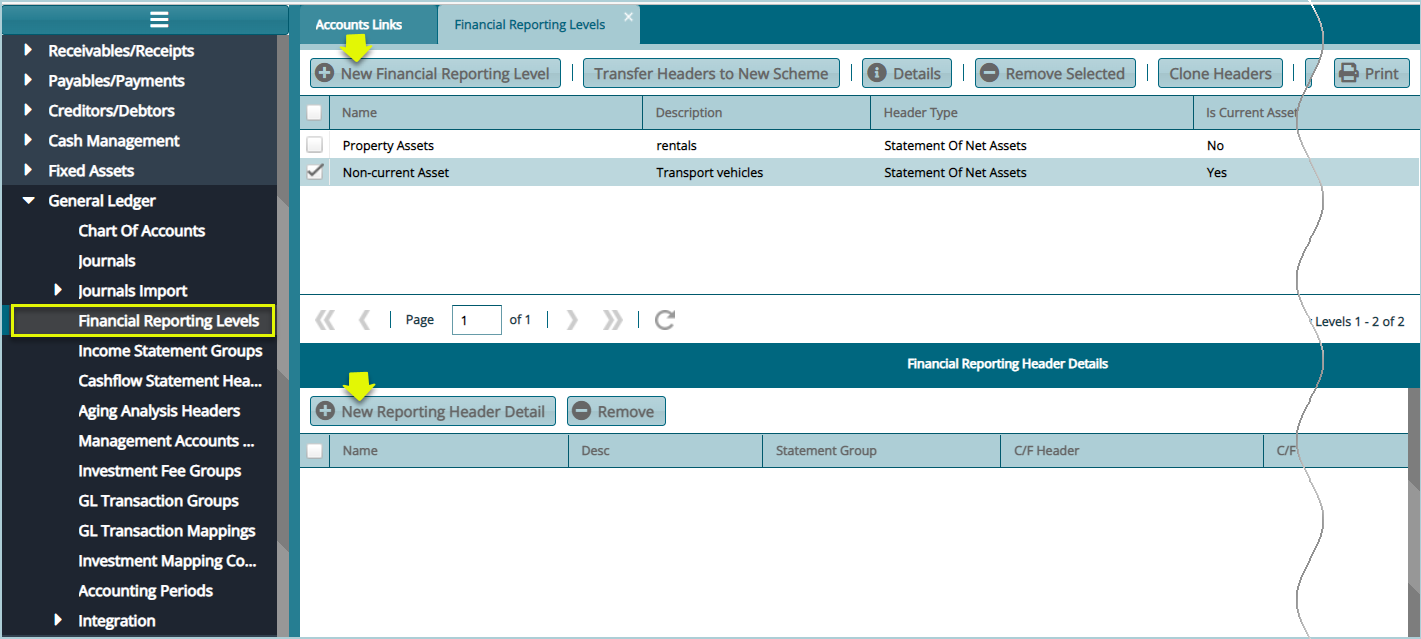
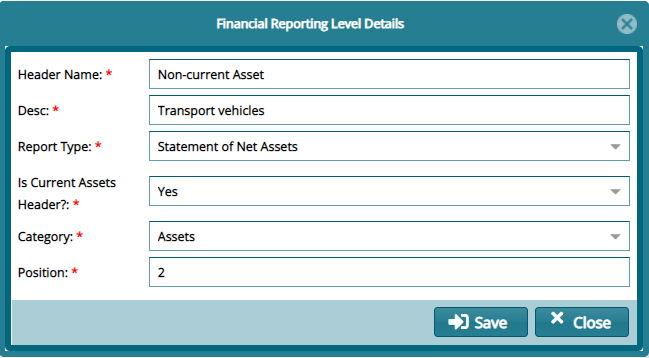
Click on the New Financial Reporting level button to display the following Financial Reporting Level Details dialog box and create a new level as shown below:
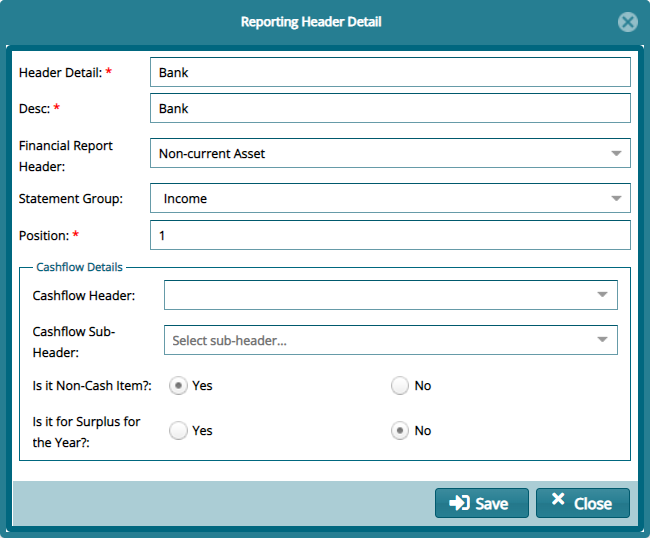
After adding a new Reporting Level as demonstrated above, select the new level from the list as shown previously. On the lower grid table, click on the New Reporting Header Details button to display the following New Reporting Header Details dialog box and create a Header as shown below:
Tips
Header Name: type the Sub header name e.g., Non-Current Assets.
Description: Type the Description for the sub header name e.g., Non-Current Assets.
Report Type: Type The type of accounts the sub header name belongs to e.g., Statement of Net Assets.
Category: Type the Main header name the sub header falls under e.g., Assets.
Position: specifies the row the sub header will appear below the main header e.g., 9 (Nineth row).
Header Name: type the name of the posting account under the Sub header name e.g., Banks.
Desc: Type the Description for the posting account under the sub header name e.g., Banks.
Statement Type: Type The type of accounts the posting account name belongs to e.g., income.
Position: specifies the row the sub header will appear below the main header e.g., 1 (first row).
# Income Statement Groups
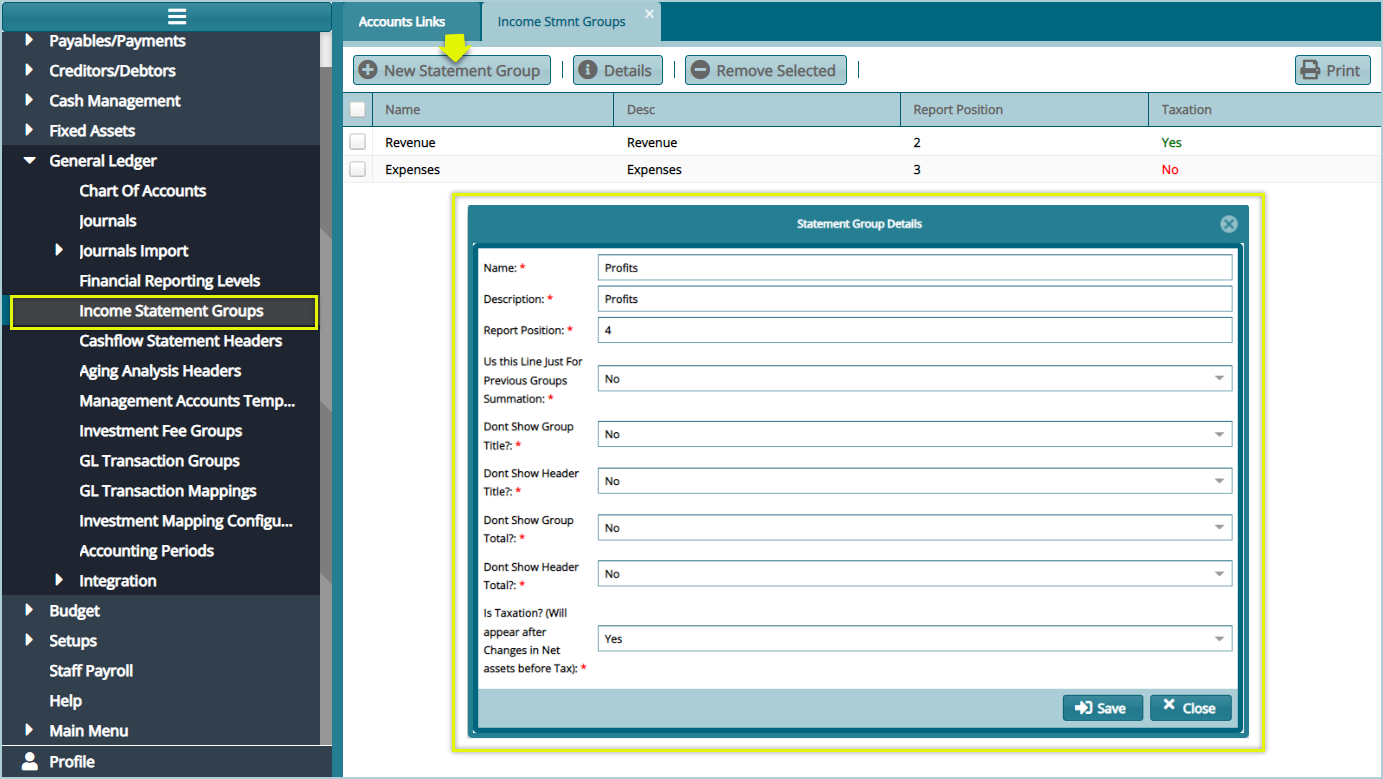
Click on the Income Statement Groups from the General Ledger drop-down menu to open a window where Statement groups are listed in a grid table. Clicking the New Income statement groups button will load an Income Statement Groups Details dialog box where details for a new group are captured. See the screenshot below:
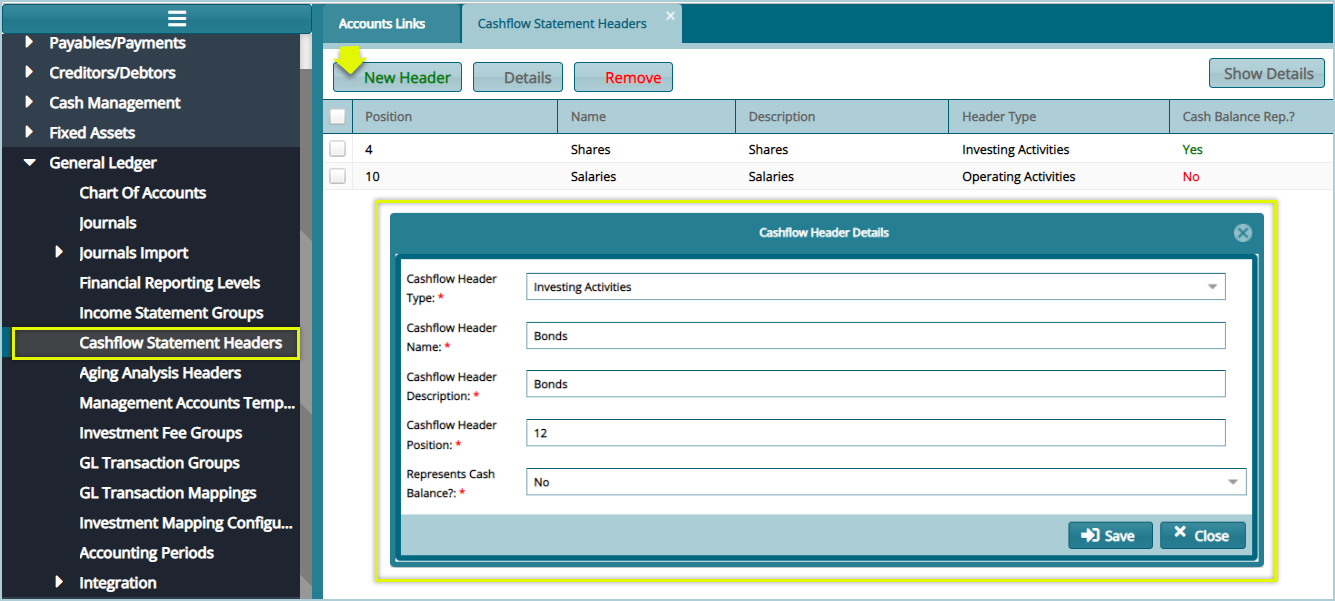
# Cash Flow Statement Header
Click on the Cash Flow Statement Header link from the General Ledger drop-down menu to open a window where Cash Flow Statement Headers are listed in a grid table. Clicking the New Cash Flow Statement groups button will load an Income Statement Groups Details dialog box where details for a new Header are captured. See the screenshot below:
# Aging Analysis Headers
Aging Analysis is the evaluation and identification of any irregularities within a scheme's debtors and creditors’ accounts.
Click on the Aging Analysis Header link from the General Ledger drop-down menu to open a window where Aging Analysis Headers are listed in a grid table. Clicking the New button will load a New Aging Analysis Header dialog box where details for a new Header are captured. See the screenshot below:

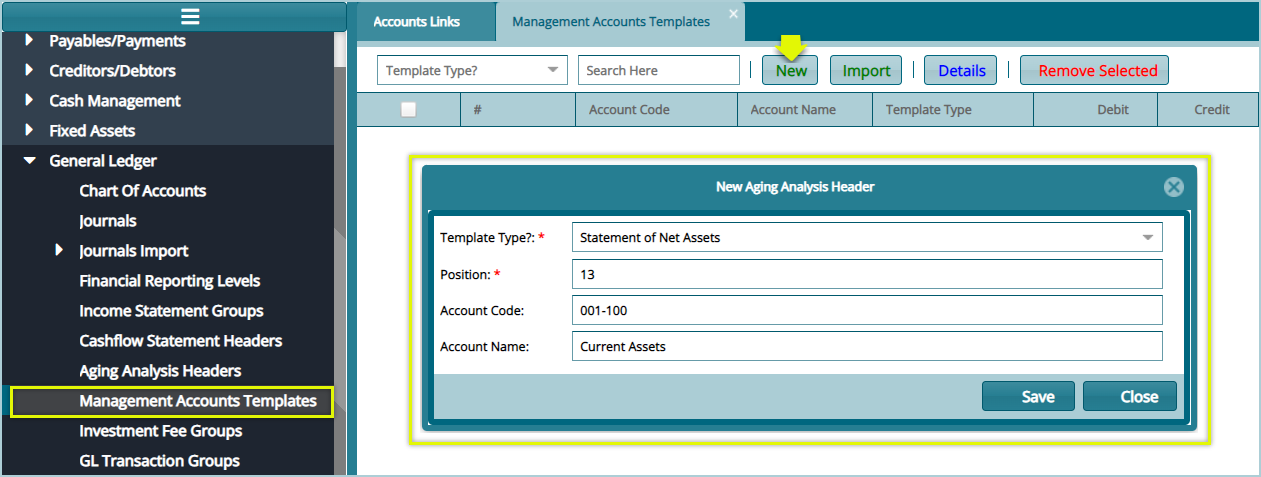
# Accounting Templates
Click on the Managing Accounts Templates link from the General Ledger drop-down menu to open a window where templates are listed in a grid table. Clicking the New button will load a New Managements Accounts template dialog box where details for a new Header are captured. See the screenshot below:
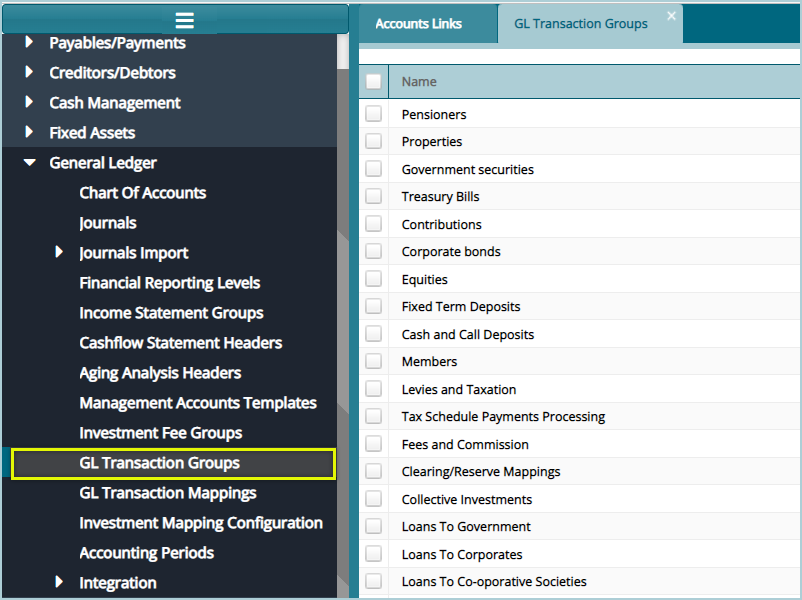
# GL Transaction Groups
In FundMaster, the GL Transaction groups and GL Transaction Mappings, aid in creating an interface of the business transactions between the investment module and the accounting module.
Click on the GL Transactions Groups link from the General Ledger drop-down menu to open a window where the GL Transactions groups are listed in a grid table. The following screenshot shows some of the groups on the list:
# GL Transaction Mappings
Click on the GL Transactions Mappings link from the General Ledger drop-down menu to open a window where the GL Transactions Mappings to GL Transaction Groups are listed in a grid table. The following screenshot shows some of the mappings on the list:
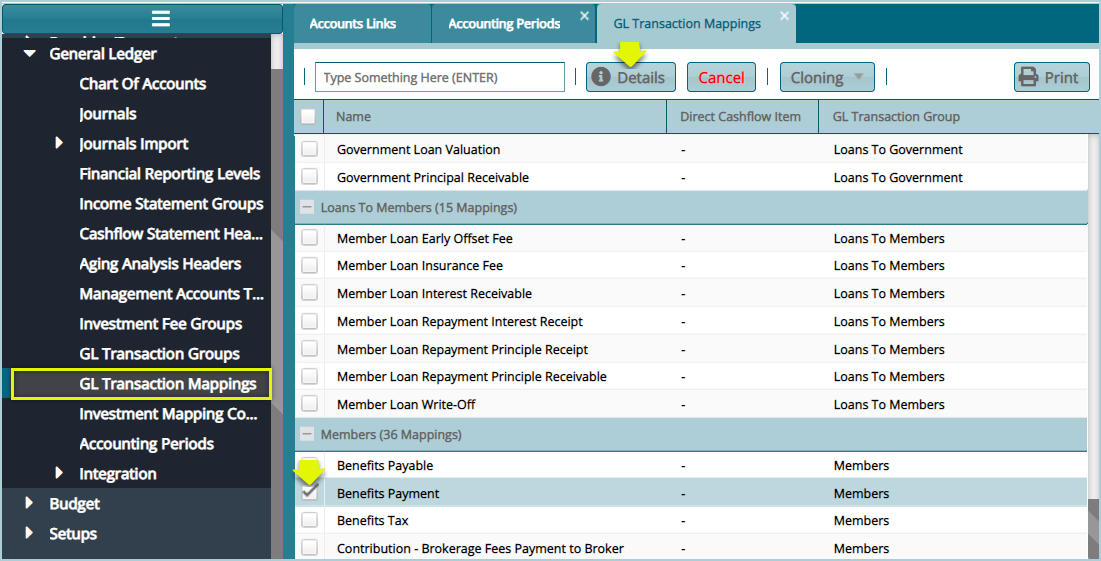
Select a transaction item from the transaction Group from the list, as shown above, and then click the Details button to open a Transaction Mapping Details dialog box where the transaction account component allocations are listed in a grid table as shown below:
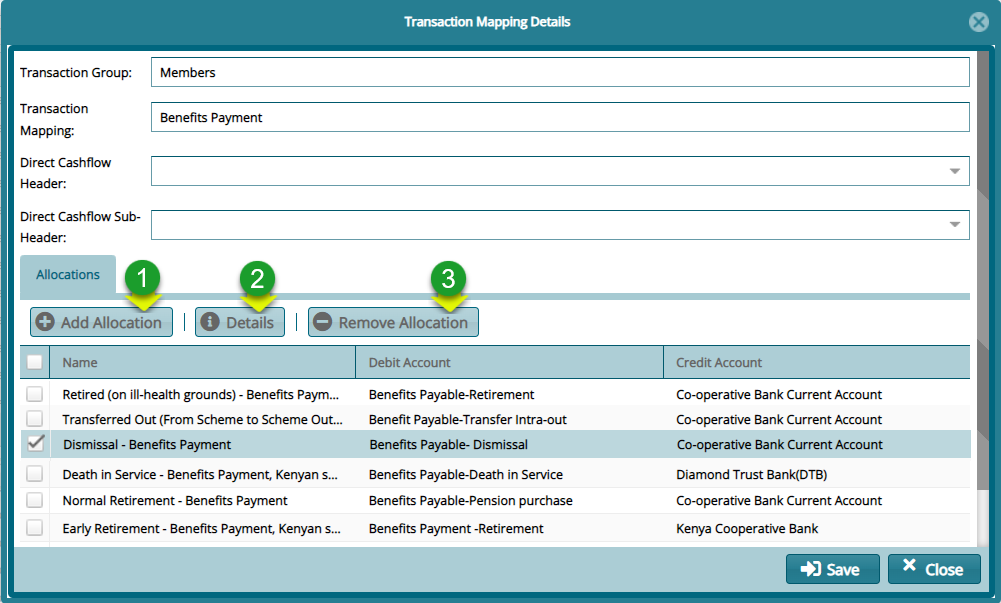
Action
Click label 1 button to create a new account component allocation.
Click label 2 button to view the details of a selected account component allocation from the list.
Click label 3 button to remove a selected allocation from the list.
Click the Add Allocation button to load the Account Components Allocation dialog box and set a new component and correctly map the accounts that should be Debited and Credited by selecting from the list of accounts as shown below:
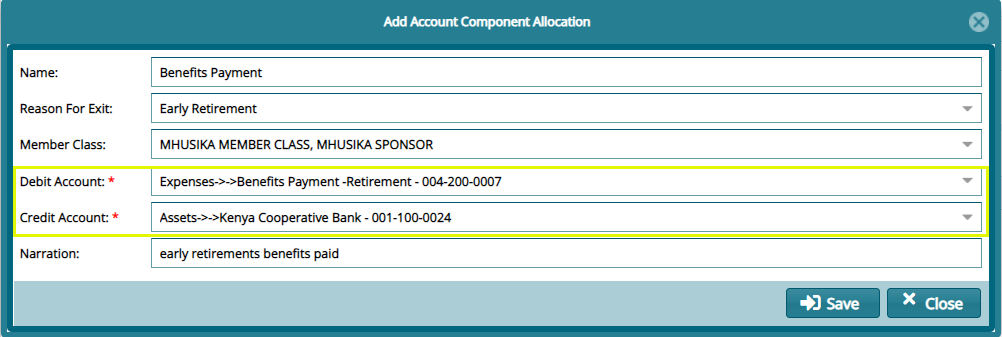
Tips
Map the transaction accounts component to the correct accounts by selecting from the lists the account to Debit and Credit respectively as shown above.
The GL Transaction groups and GL Transaction Mappings in the FundMaster are hard corded in that they are built into the system, and they are not added by the user.
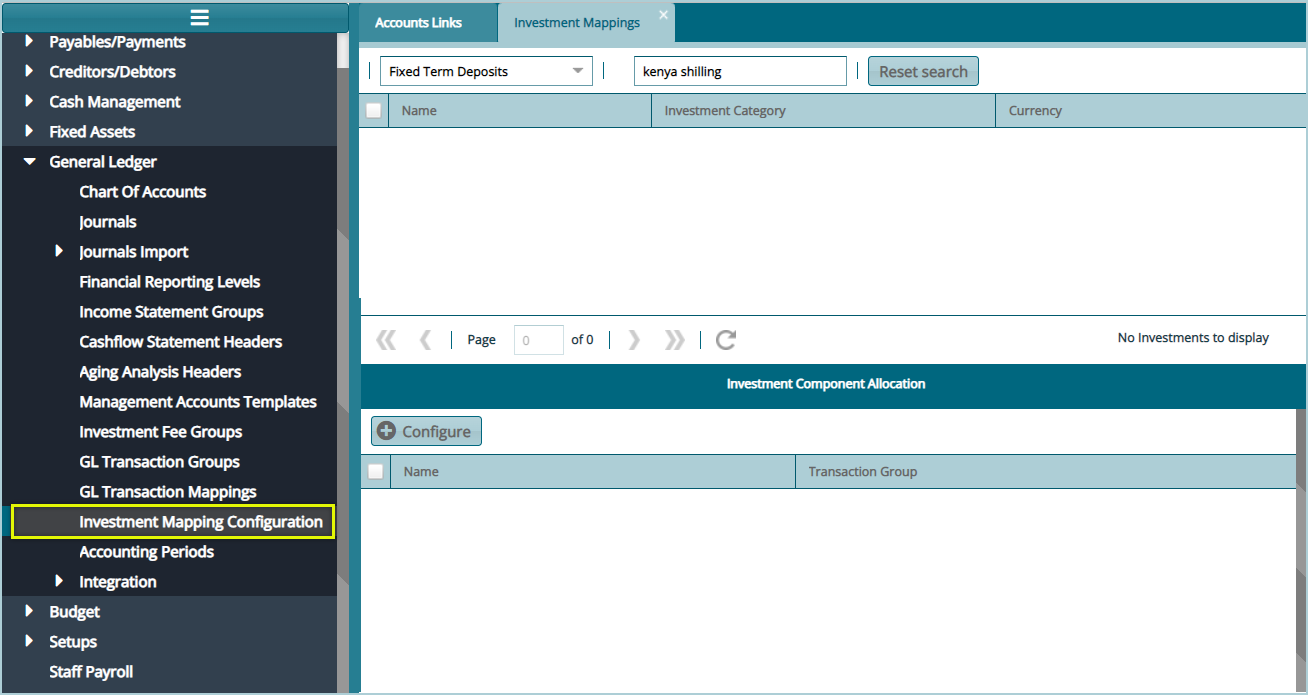
# Investment Mapping Configs
The investment classes’ items are created in the Investment Module when you create an investment such as property, Equity, Bonds & Securities, and Deposits as shown below:
# Accounting Periods
The accounting periods are created at the scheme creation stage in the Scheme Setup Module (Scheme Menu, New Scheme) by setting up:
The take on date
Financial Year Start day
Date of Commencement
You can define the accounting periods to either be populated in:
Quarterly Periods
Monthly periods
The system creates financial years by default.
Click on the Accounting Periods link from the General Ledger drop-down submenu as shown below:

Clicking the link, as shown above, will load a window on the right side of the menu where the accounting period for the working scheme is listed in a grid table as shown in the screenshot below:
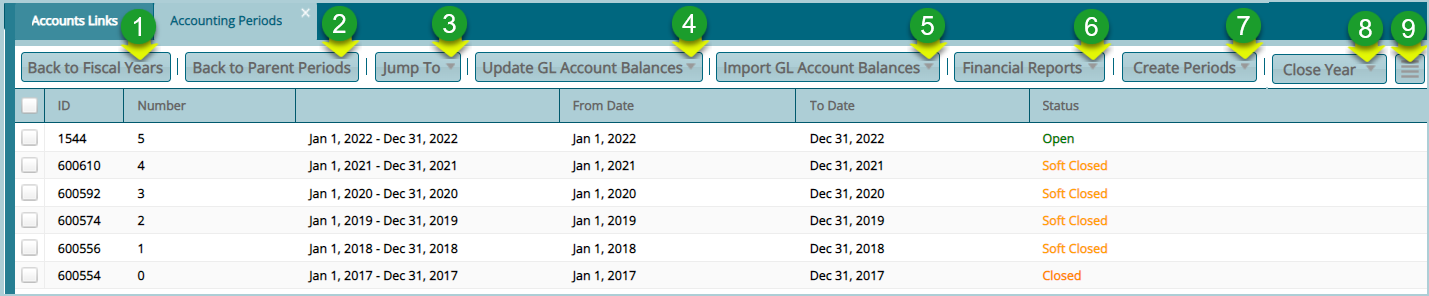
Action
Click label 1: Back to Fiscal Years button to move either from the monthly periods to quarterly periods back to fiscal years or from monthly periods back to fiscal years.
Click label 2: Back to Parent Periods button after selecting a period from the list to see the actual periods.
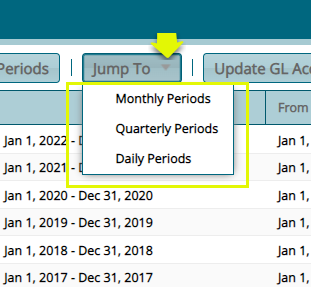
Click label 3: Jump To button and from the drop-down menu selected either monthly, quarterly, or daily periods to load a tabulation of the respective periods as shown below:
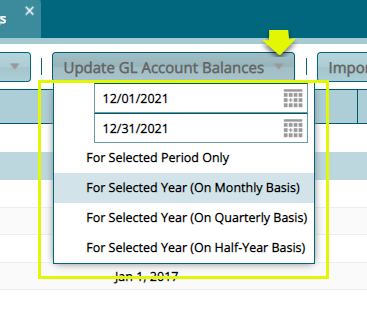
- Click label 4: Update GL Account Balances button after selecting a period from the list to update the members’ balances. It adds the present year’s contributions to the previous year’s closing balances as shown below:
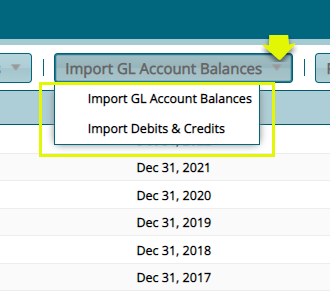
- Click label 5: Import GL Account balances button after selecting a period from the list to import previous years’ GL closing balances in order to update the GL accounts present balances. You can also import Debits and Credits as shown below:
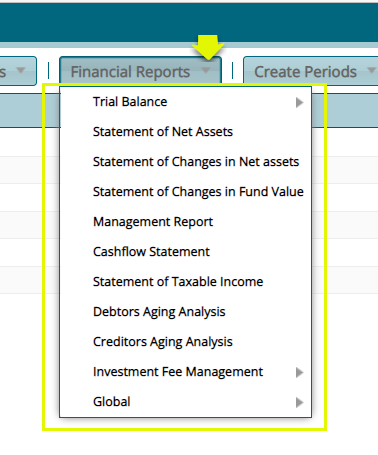
- Click label 6: the Financial Reports button after selecting a period from the list to access links to generate and print different reports such as trial balances for the selected period from the list as shown below:
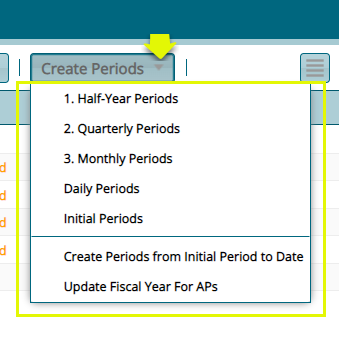
- Click label 7: Create periods button after selecting a period from the list to create new periods.
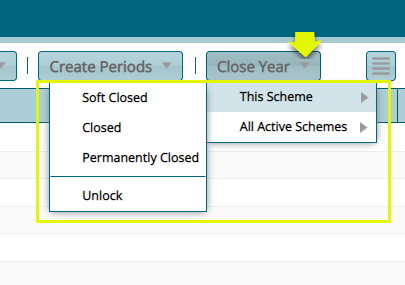
- Click label 8: Close Year button after selecting a period from the list to soft close an open period, close a period that is soft closed, or permanently close a period that is closed. Select the option for a working scheme or all active schemes as shown below:
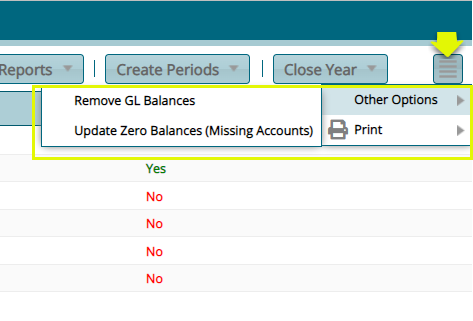
- Click label 9: the Details button to remove GL balances, update zero balances, or print statements from the drop-down list as shown below:
← Fixed Assets Budget →