# Receivable/Receipts
Configurations under the Receivable/Receipts category are set to aid in the management of money that is flowing into a scheme. Click on the drop-down submenu links to open the respective windows for specific configurations as shown below:

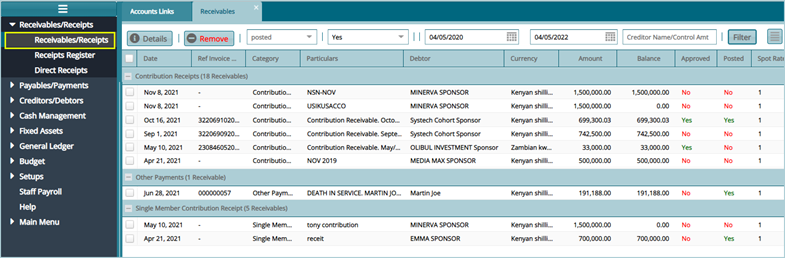
# Receivables
Clicking the Receivables/Receipts link will launch the Receivables window where a list of all receivables created in the scheme is listed as shown below:
# Create a New Receivable
To create a new receivable, navigate to the Debtors window where a list of all debtors in a scheme is displayed in a grid table. Records in the table can be filtered either by name or displayed based on balances. Select the debtor to create a Receivable (known as an invoice towards a due payment) as shown in the following screenshot:
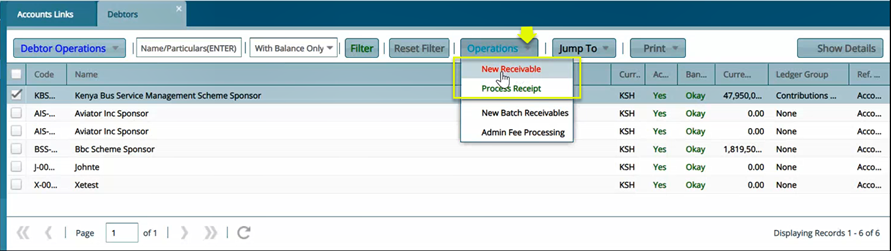
Clicking the New Receivable as shown in the previous screenshot will open a dialog box through which the details of a payment are to be provided as shown in the following screenshot:
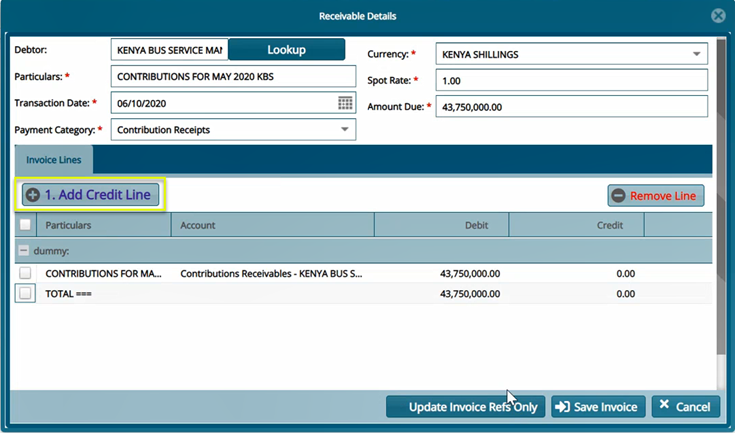
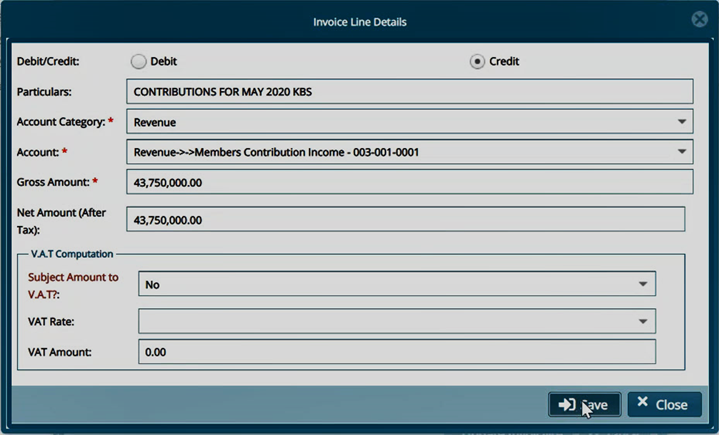
Clicking the Add Credit Line button as highlighted above will open a new dialog box where some extra invoice settings are done such as Mapping the Invoice to the correct payable account and balance accounts. See the screenshot below:
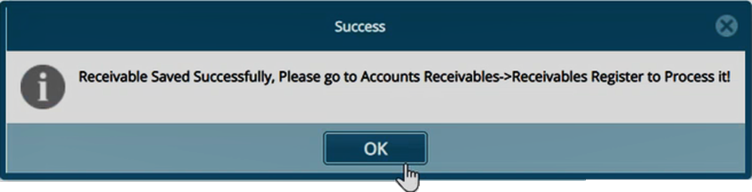
After providing the invoice details in the above dialog box, click the Save button to confirm the creation of a receivable by loading a Success pop-up dialog box with a confirmation message as shown below:
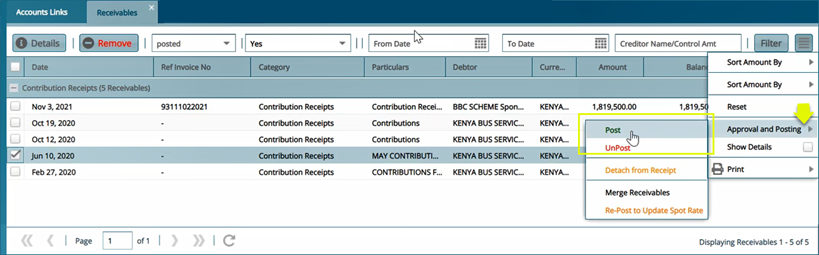
After successfully creating a Receivable, navigate back to the Receivables window where your newly created receivable is listed among other receivables created in the scheme. Select the receivable you just created and Post it as shown below:
# Receipts Register
The Receipt Register stores the records of all receipts for various forms of payments done in a scheme.
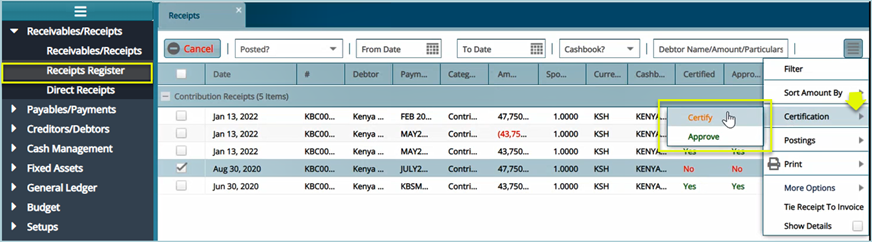
Click the Receipts Register link to open the Receipts window. For certification of the receipt, select it from the list and click the Certify and Approve buttons respectively as shown below:
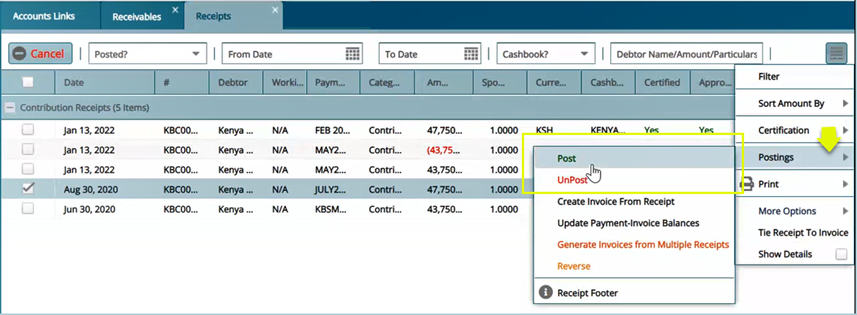
After a successful certification of a receipt, the next step is to Post it – publish the verified transaction. The following screenshot shows how to post a receipt (note that a receipt can also be unposted):
# Direct Receipts
FundMaster allows the creation of a receipt which can then be tied to contributions received from scheme members or any other form of payment done to a scheme.
To see all direct receipts created in a scheme, click the Direct Receipts link to open the Direct Receipts window where a new receipt can be created, details of an existing receipt viewed, a receipt canceled, certified, and posted. Records in the grid table can also be filtered by dates or debtor’s name, amount, or particulars. See a sample screenshot below:
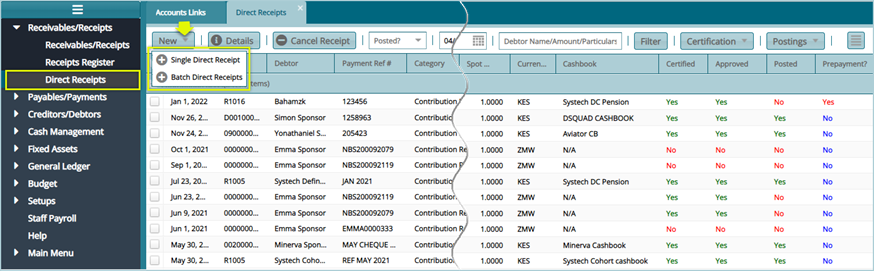
To create a new receipt, click the Single Direct Receipt link (receipts can also be added in batch: click the Batch Direct Receipts link) from the drop-down menu. This will open a new window through which the configurations are done as shown in the screenshot below:
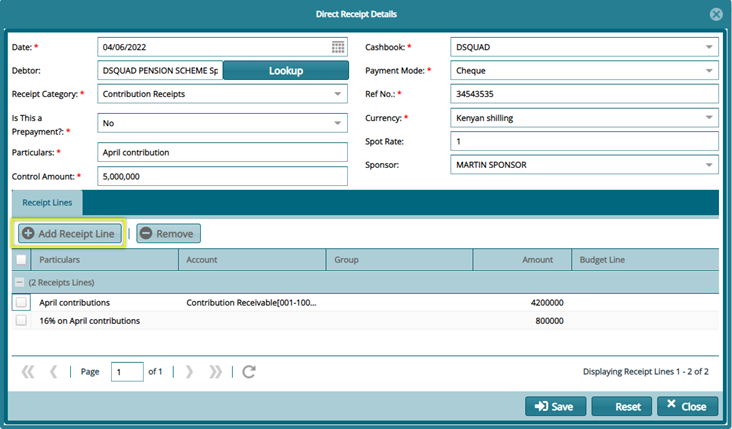
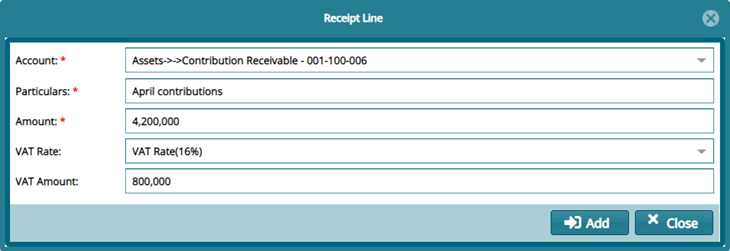
Clicking the Add Receipt Line button, as highlighted above, will open a new form where the receipt is linked to an account (e.g., a specific account used for collecting a scheme’s members’ contributed money) and other details such as VAT tax are configured as shown in the screenshot below:
Note: After creating a new direct receipt, remember to navigate back to the receipts window to authorize and post the receipt.