# Members Documents Checklist
For successful registration of members, the administrators of a scheme will need the members to submit specific documents as a requirement for the registration process. The screenshot below shows the window through which a list of such documents is displayed:

Action
Click label 1 button to create a new document checklist.
Click label 2 button to view the details of a selected document checklist.
Click label 3 button to process the distribution of a selected checklist to the target group.
Click label 4 button to import the document checklist.
Click label 5 button to remove a selected checklist from the list.
Click label 6 button to get information regarding what the document checklist is.
Click label 7 button to view a print layout copy of checklist listing, compliance report, etc.
Click label 8 button to open a grid table on the lower side of the window showing members’ document checklist application. The documents from members can be received, reversed, or removed.
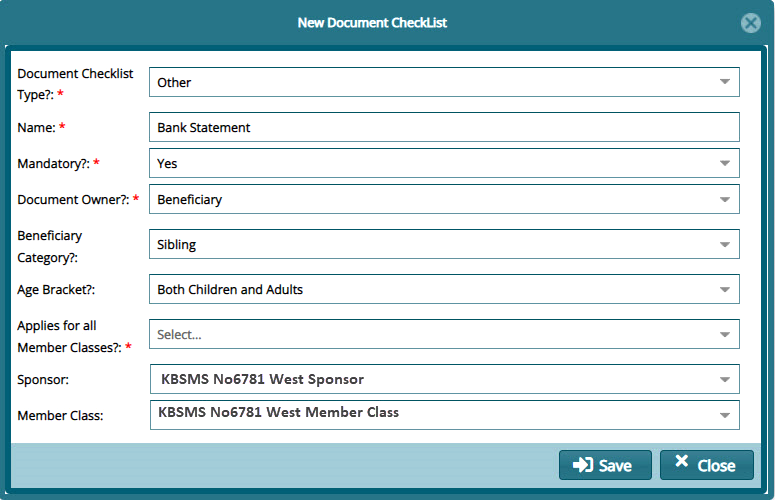
# Adding New Document checklist
To add a new document checklist, click the New button, as shown previous, to open a dialog box through which the details for a new document checklist are captured and saved as shown below:
Clicking the Process Checklist Application button will open a dialog box through prompting for confirmation regarding the distribution of the document checklist to members as shown below:

Click the Yes button to load another dialog box through which a document checklist is distributed to members based on the statutes selected from the drop-down list as shown below:

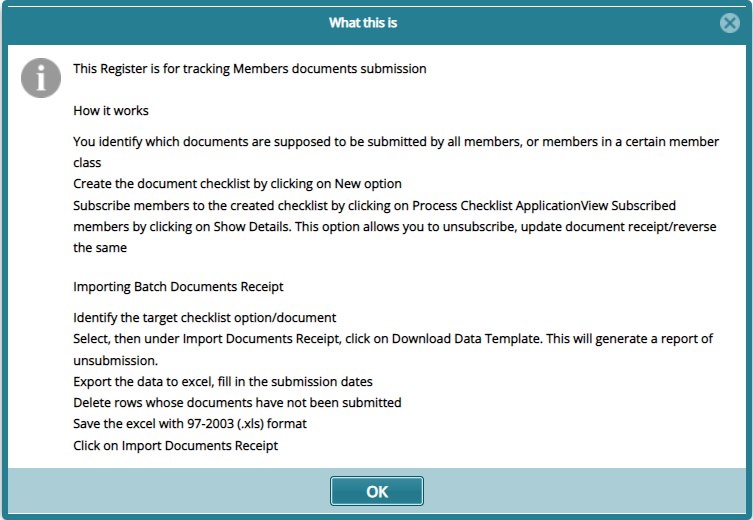
Click the What is this button to open a new window displaying detailed information as shown below:
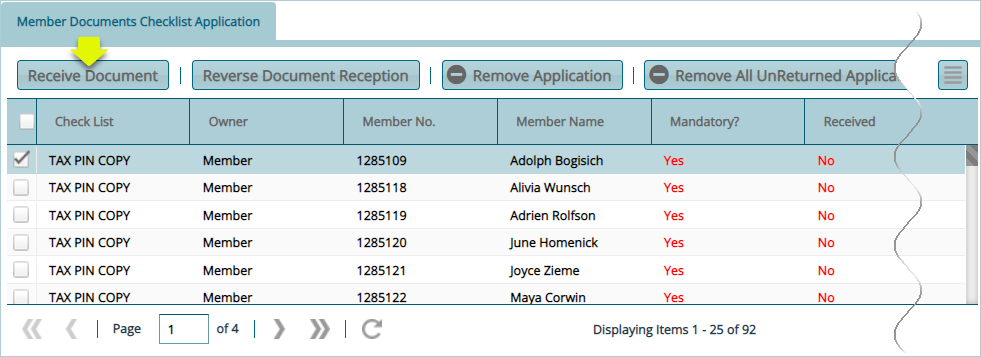
# Receiving Documents
Click the Receive Document button after selecting a member from the list. Otherwise reverse a received document, remove applications among other actions as shown below:
Clicking the Show Details button (as shown previous) will display a new section within the same window with a grid table listing documents that need to be uploaded to the system towards a member’s verification process.
To upload a document, click the Receive Document button after selecting a member from the list. Otherwise, reverse a received document, and remove an application among other actions as shown below: